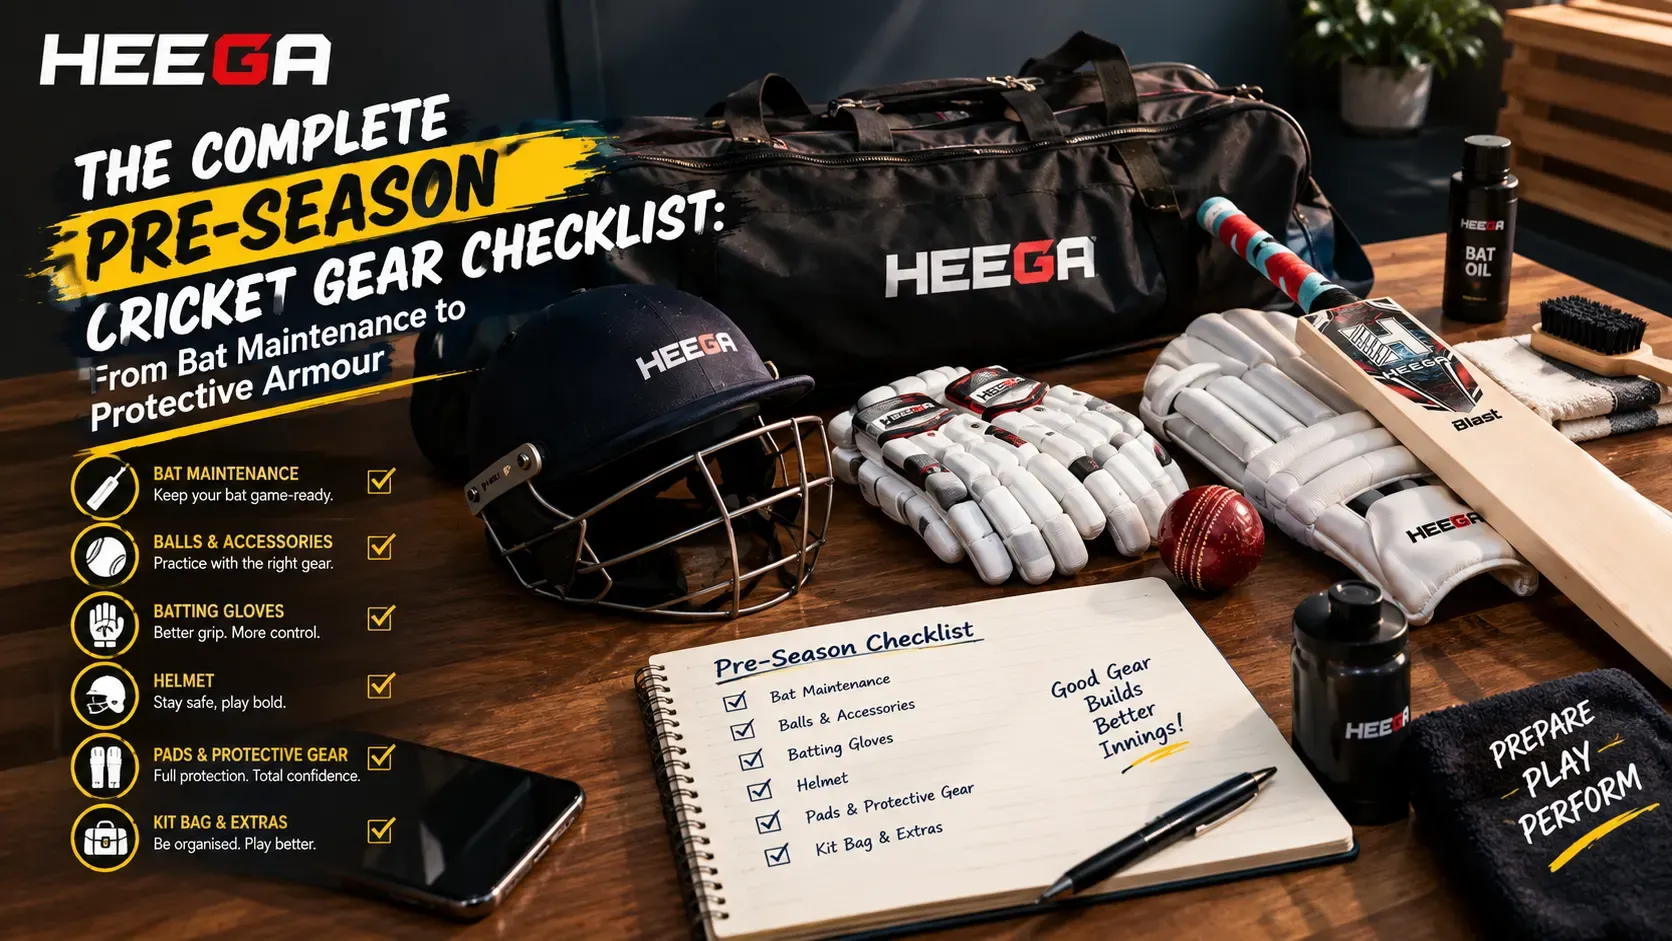
The Complete Pre-Season Cricket Gear Checklist: From Bat Maintenance to Protective Armour.
Introduction
As the crisp morning air signals the return of a new cricket season, players at every level—from grassroots weekend warriors to seasoned division stalwarts—begin flocking to the nets for pre-season practice. We spend hours refining our front-foot cover drives, re-calibrating bowling run-ups, and building core physical fitness. However, one critical factor is routinely overlooked until the morning of the first competitive fixture: the state, readiness, and structural safety of our cricket equipment.
Entering a new competitive campaign with neglected gear, a bone-dry unknocked bat, frayed pad straps, or an unsafe helmet is a recipe for disaster. Equipment failure on the field not only compromises your individual performance and leads to costly mid-season replacements, but it also exposes you to serious, preventable sports injuries. A cricket ball weighs roughly 156 grams, is as hard as granite, and travels at speeds that leave zero margin for error. Your gear is your frontline defense and your primary performance vehicle.
A systematic pre-season audit ensures that every piece of kit in your bag is structurally sound, hygienic, compliant with international safety standards, and tuned to operate at maximum efficiency. In this comprehensive, step-by-step master guide, we break down the ultimate pre-season cricket gear checklist—covering bat inspection, willow maintenance, body armor, footwear engineering, wicketkeeping gear, emergency repair kits, and smart kit bag management—so you can step out to the middle with absolute confidence.
1. Cricket Bat Inspection, Restoration & Maintenance Protocol
Your bat is the extension of your arms and the absolute center of your batting identity. Sitting dormant in a damp garage, cold shed, or hot cupboard during the off-season drastically alters the internal moisture balance of English and Kashmir willow timber (Salix alba var. caerulea). Before facing your first real delivery in the nets, execute this non-negotiable multi-step bat care protocol.
A. Stripping Down & Performing a Structural Audit
Begin by carefully removing old anti-scuff face sheets, degraded edge tape, and hardened rubber handle grips to expose the bare willow timber beneath. Inspect every single square inch of the blade under clear, direct lighting:
- Toe Cracks & Splintering: Inspect the bottom two inches of the blade closely. Digging out late yorkers or playing on wet early-season turf causes excessive moisture absorption and horizontal stress fractures across the toe. Small surface hairline cracks can be sanded down smoothly, but deep splits require immediate PVA wood glue clamping or specialized fiberglass binding before further use.
- Edge Delamination: Run your fingers along the vertical outer edges. Look for long, longitudinal surface splits where high-speed off-center ball strikes have pinched the soft outer wood fibers away from the core mass.
- Splice & Handle Integrity: Hold the blade firmly between your feet and gently twist the handle in a counter-rotational motion. Listen carefully for clicking or creaking sounds coming from inside the rubber-and-cane splice joint. Any structural movement or noise indicates that the internal epoxy adhesive has failed, requiring professional handle replacement.
B. The Re-Oiling & Moisture Stabilization Process
Willow is a natural, porous organic material that functions best when its internal moisture level remains tightly controlled between 10% and 12%. Dry willow becomes extremely brittle and shatters upon high-velocity impact, while waterlogged willow turns soft, heavy, and completely dead to the touch.
- Use fine-grade sandpaper (180 to 240 grit) to lightly rub down the face, edges, and back to open up the wood pores.
- Pour roughly one small teaspoon (approximately 5ml) of pure raw linseed oil onto the face of the bat. Using a clean lint-free cloth or your finger pads, spread the oil evenly across the hitting face, outer edges, toe, and back shoulders.
- CRITICAL WARNING: Never allow linseed oil to pool near the splice joint, handle binding twine, or rubber grip area. Oil acts as a solvent against traditional bat-making glues and will cause the splice or handle binding to fail prematurely.
- Place the bat horizontally flat on its face on a clean sheet of paper or towel for at least 24 to 36 hours. Laying it flat ensures the oil penetrates evenly across the depth of the cleft rather than running down and pooling in the toe.
C. Re-Knocking-In and Edge Hardening
Even a well-used bat from the previous season requires a light re-compaction routine after an off-season rest to reactivate the compressed willow fibers and prevent unexpected seam marks.
- Take a wooden bat mallet and begin systematically striking the face in soft, repetitive motions, starting from the middle and working outwards toward the edges.
- Focus heavily on rounding off the prominent vertical edges at a smooth 45-degree angle. By gently hammering the sharp outer corners into a subtle curve, you compress the soft outer cell walls, drastically reducing the chance of edge-splitting when edge hits occur in match play.
- Never strike the direct bottom toe or the top back spine directly with heavy force with a mallet, as this can cause structural shearing along the timber grain.
D. Modern Face Protection & Grip Fitting
Once the linseed oil has dried completely (verifiable when the surface no longer feels greasy or tacky to the touch), apply modern protective shielding:
- Anti-Scuff Facing: Apply a clear, self-adhesive polycarbonate anti-scuff sheet over the entire hitting face. Squeegee out all air bubbles starting from the spine center working outward to lock in natural moisture, prevent surface bruising, and protect against humidity shifts.
- Fiber Reinforcement: Run strips of cross-weave fiberglass edge tape down both side walls to lock the lateral timber fibers tightly together.
- Fresh Grip Application: Roll off the dry, hardened old grip. Apply a fresh high-traction multi-textured rubber grip using a wooden grip cone. A supple, fresh grip absorbs handle vibration, reduces top-hand twisting, and prevents forearm fatigue during long innings.
2. Lower-Body Armor & Personal Safety Gear
Cricket balls delivered at speeds ranging from 100 km/h to over 140 km/h carry immense kinetic energy. Inadequate lower-body padding results in painful contusions, bone bruising, or severe fractures that can derail your entire summer campaign.
A. Batting Leg Guards (Pads) Audit
Modern batting pads utilize a combination of high-density EVA foam, traditional cane rods, and synthetic polyurethane (PU) outer skins to disperse high-speed ball impacts safely.
- Velcro Strap & Buckle Functionality: Test all three hook-and-loop (Velcro) attachment straps on both pads. Over time, accumulated grass, dirt, and friction wear down the micro-hooks, causing straps to slip during rapid running between wickets. Replace frayed or slipping straps immediately.
- Knee Roll Alignment: Put on your actual match batting boots and fit the pads as you would on match day. Stand in your standard batting stance and verify that the center of the internal knee roll aligns directly over your patella joint. If the knee roll sits too high or too low, your knee joint is dangerously exposed to direct impacts during awkward defensive shots or low bounces.
- Internal Fabric Hygiene & Mold Inspection: Inspect the internal fabric lining, especially around the bottom wing and instep. Damp early-season grass moisture often gets trapped inside pad lining, causing mold and unpleasant odors. Clean internal fabric surfaces with specialized anti-bacterial foam cleaner and allow them to air-dry thoroughly away from direct heat sources.
B. Thigh Guards & Inner Thigh Protection
Modern seam bowlers target the gap between your hip and knee continuously. Operating with inadequate thigh protection leads to severe thigh hematomas that severely restrict your running mechanics.
- Integrated Dual-Thigh Harnesses: Upgrade from old-fashioned, single-strap loose thigh pads to a modern dual-thigh harness system. These systems feature fully adjustable elastic waistband straps that lock both outer and inner thigh guards comfortably in place, moving seamlessly with your stride without shifting down your leg.
- Density Testing: Press your thumb firmly into the center of the thigh guard foam. If the foam stays compressed or feels brittle and hollow, the internal impact-absorption properties have broken down, rendering it ineffective against genuine pace.
C. Abdominal Guard (The Box) & Compression Supporters
- Never step into a net session or match scenario without a high-impact polycarbonate or steel-rimmed abdominal guard.
- Inspect the outer soft-rubber perimeter flange for cracks, hardening, or tears. A damaged flange can pinch skin or fail to transfer impact forces safely around the pelvic structure.
- Pair your abdominal guard with specialized cricket compression shorts featuring a fitted front cup pocket. This keeps the guard rigidly locked against the body, eliminating painful slipping during quick turns while running between wickets.
3. Upper-Body & Head Protection: Helmet, Gloves & Guard Audit
Upper-body protective gear guards your most vital organs, facial structure, hands, and head against erratic bounce and short-pitched bowling.
A. Helmet Safety Audit & BS7928:2013 Standards
Head safety is the most critical element of your entire gear setup. Never compromise on helmet structural integrity.
- Verify Safety Certifications: Ensure your helmet complies with the latest international safety standard (BS7928:2013), which enforces strict testing protocols against ball impacts to both the main helmet shell and the facial grille peak.
- Structural Shell & EPS Liner Audit: Thoroughly examine the outer composite plastic or carbon-fiber shell and the inner expanded polystyrene (EPS) foam liner. If your helmet has previously taken a direct, heavy strike from a fast bouncer—even if there are no visible external cracks—replace it immediately. Internal EPS foam compresses permanently upon heavy impact to absorb kinetic force, meaning a second strike in the same area offers drastically reduced protection.
- Grille Distance & Adjustment: Inspect the metal or titanium facial grille attachment bolts. Ensure the gap between the helmet peak brim and the top bar of the grille is narrower than the diameter of a standard cricket ball (less than 70mm), preventing a ball from squeezing through during a mis-timed hook shot.
- Retention System & Chin Strap: Test the quick-release chin strap buckle and the rear dial-fit adjustment wheel to ensure the helmet sits firmly and comfortably without wobbling when you move your head rapidly.
B. Batting Gloves
Batting gloves suffer tremendous wear and tear due to continuous friction, hand sweat, and direct ball impacts on finger rolls.
- Palm Leather Inspection: Examine the supple Pittards or calfskin leather palms for smooth worn spots, tear holes, or severe stiffening. Dried-out, sweat-crusted leather stiffens like cardboard, severely reducing your bat handle feel and causing painful skin blisters during long innings.
- Finger Roll & Thumb Shielding: Inspect the high-density foam finger rolls and plastic insert inserts, particularly on the lead hand's thumb and index finger. Ensure the protective plastic caps inside the lead thumb have not cracked or shifted out of alignment.
- Hygiene & Leather Conditioning: Treat hard leather palms with specialized leather balm to restore natural softness and flexibility. Always air-dry gloves in a shaded, well-ventilated area after practice rather than leaving them stuffed inside a dark, damp kit bag.
C. Chest, Rib & Arm Guards
- For batters facing high-velocity bowling on hard, unpredictable surfaces, lightweight chest and rib guards provide essential protection for the ribcage. Ensure the elastic torso straps fit comfortably flat against your inner shirt without restricting shoulder rotation during expansive drive strokes.
4. Footwear Engineering & Spike Care
Your feet sustain immense forces during cricket—a fast bowler's landing foot absorbs impact forces equal to up to eight times their body weight upon stride foot strike. Wearing worn or incorrect footwear is the leading cause of ankle sprains, shin splints, heel spurs, and lower back pain.
A. Spike Inspection, Stud Replacement & Thread Maintenance
- Full Spikes vs. Half Spikes vs. Rubber Cleats:
- Fast Bowlers & Front-Foot Batters (Grass Turf): Require full metal spike outsoles (typically 7 to 8 metal spikes per shoe) to deliver maximum ground traction during the delivery stride and firm front-foot planting.
- Spinners & Wicketkeepers: Often prefer half-spike setups (metal spikes under the forefoot and rubber studs under the heel) for rapid agility, pivot capability, and reduced weight.
- Synthetic & Indoor Nets: Must use specialized rubber TPU stud outsoles. Wearing metal spikes on synthetic pitches causes severe joint stress and slips on hard concrete sub-bases.
- Spike Thread Care: Use a metal spike key to unthread every spike stud. Clean out dried mud, rust, and grit from the threaded internal sockets. Apply a small drop of machine oil or silicone grease to the threads before screwing in fresh metal spike studs to prevent thread seizing during the rainy months.
B. Midsole Cushioning & Upper Ankle Support
- Inspect the compressed EVA or gel midsole of your shoes. Look for lateral compression creases or uneven tread wear. When midsoles compress permanently, their ability to attenuate impact shock degrades, transferring raw landing energy directly up into your shins, knees, and lumbar spine.
- Fast bowlers should strongly consider high-top or mid-cut spike designs that feature external ankle support straps to prevent ankle inversion during the aggressive foot-plant phase.
5. Wicketkeeping & Specialized Fielding Gear Audit
Wicketkeepers and specialized fielders require purpose-built equipment engineered to combine flexible mobility with high-impact hand and body protection.
A. Wicketkeeping Gloves & Regulation Compliance
- Webbing Law Compliance: Inspect the leather webbing connecting the thumb and index finger. Under official MCC Law 27 regulations, the webbing must be taut and securely fastened, ensuring it does not form an illegal extended net or pouch.
- Rubber Catching Palm Inspection: Examine the pimpled rubber facing attached to the catching palm. Worn-down, smooth rubber patches reduce surface friction, causing catches to pop out of the web. Replace worn rubber facings or upgrade to a new pair if the rubber has degraded.
- Chamois & Gel Padded Inner Gloves: Never keep wickets without high-quality chamois or gel-padded inner gloves. Inner gloves protect finger joints against repetitive micro-trauma, absorb hand perspiration, and preserve the internal lining of your main keeping gloves.
B. Wicketkeeping Leg Guards
- Wicketkeeping pads are shorter, lighter, and feature a specialized single-knee roll design with minimalist side wings. This allows unhindered squatting, diving, and swift lateral movement. Ensure rear elastic straps fit snugly without digging into the back of your knees during repeated crouching.
C. Specialized Fielding Accessories
- Fielding Sunglasses: High-grade UV400 polarized sunglasses with shatterproof polycarbonate lenses are essential for tracking high catches into the sun while protecting your eyes against harmful ultraviolet radiation and windborne dust.
- Finger Taping: Keep rolls of rigid zinc oxide athletic tape in your bag for taping slip-catchers' fingers and supporting joint ligaments during intense fielding drills.
6. Kit Bag Organization, Maintenance & Essential Accessories
A cluttered, dirty kit bag damages your gear through unnecessary friction, creates foul odors, and causes frustration on match day when you can't locate essential items.
A. Selecting the Right Bag Design: Wheelie vs. Duffle
- Heavy Wheelie Bags: Feature reinforced base plates, heavy-duty off-road wheels, and multi-compartment layouts. They are ideal for carrying complete senior kits, including multiple bats, spare footwear, and heavy protective pads.
- Ergonomic Duffle Bags: Feature padded backpack shoulder straps, vertical standing layouts, and internal padded bat scabbards. Duffles are the preferred choice for players commuting on public transport or changing in compact dressing rooms.
- Internal Bat Isolation: Ensure your bag has dedicated, padded internal bat sleeves that isolate your delicate willow blades from sharp metal shoe spikes, heavy helmet grilles, and damp gear.
B. The Ultimate Pre-Season Emergency Repair Pouch
Keep a compact, water-resistant accessory pouch inside your main kit bag stocked with these vital emergency tools:
- Extra high-traction rubber bat grips and a wooden grip cone
- Wooden bat mallet and raw linseed oil with a soft cloth
- Clear anti-scuff sheets and heavy-duty fiber edge tape
- Spare metal spike studs, rubber cleats, and a heavy-duty metal spike wrench
- Rigid zinc oxide sports tape, blister plasters, and antiseptic wipes
- Microfiber towel and anti-bacterial helmet/pad cleaning spray
7. Structured Pre-Season Preparation Timeline
To avoid a last-minute rush and panic on the eve of your opening match, execute this detailed four-week step-by-step preparation timeline.
Four Weeks Before First Match: Deep Cleaning, Structural Audits & Willow Prep
Four weeks out from your season opener is the time for heavy maintenance and deep structural audits. Begin by unzipping your entire kit bag and removing every piece of equipment. Vacuum out dry dirt, grass seed, and grit from the bottom of your bag compartments. Clean all PU leather pads and gloves using a damp cloth and mild disinfectant spray.
Take down your cricket bats, strip off old protective facing sheets and side tapes, and perform a thorough inspection for hairline toe cracks or edge splits. Lightly sand the face using 240-grit sandpaper and apply a single, even teaspoon of raw linseed oil. Lay your bats flat on their face for at least 24 to 36 hours to allow the oil to penetrate deep into the timber matrix. Concurrently, inspect your helmet for shell hairline cracks or loose visor grilles, and test all Velcro straps on your batting and thigh pads.
Three Weeks Before First Match: Re-Knocking, Grip Fitting & Spike Overhauls
Three weeks before game day, focus on fine-tuning and surface protection. Once your cricket bats have completely absorbed the linseed oil, take a wooden mallet and re-knock the face and edges to compress outer fibers. Apply a fresh clear polycarbonate anti-scuff sheet across the hitting face, run cross-weave fiberglass tape along the side edges, and fit a new high-traction rubber grip onto the handle.
Turn your attention to your footwear. Use a metal spike key to unthread every single metal stud from your bowling or batting spikes. Clean out dried dirt and rust from inside the threaded sockets, apply a tiny drop of silicone grease or machine oil to the threads, and screw in fresh metal spike studs or rubber cleats. This is also the ideal time to apply leather balm to your batting glove palms to restore suppleness after months of storage.
Two Weeks Before First Match: Realistic Net Practice & Gear Calibration
With two weeks remaining, transition from static gear maintenance to active gear testing under realistic training conditions. Wear your full match kit—including your helmet, thigh guard harness, batting pads, gloves, and spiked footwear—during intense indoor or outdoor net practice sessions.
Pay close attention to how your gear feels in motion. Ensure your pad knee rolls align properly over your knee joints during your batting stride, verify that your helmet chin strap stays secure without wobbling during rapid head movements, and ensure your spike outsoles provide firm traction on damp grass or synthetic net surfaces. If any piece of gear feels loose, restrictive, or uncomfortable, you still have ample time to make final adjustments or purchase replacements before match day.
One Week Before First Match: Final Packing & Emergency Pouch Audit
In the final week leading up to your opening fixture, pack your kit bag systematically. Restock your emergency repair pouch with fresh grips, grip cones, spare metal spikes, a spike wrench, anti-scuff tape, zinc oxide athletic tape, blister plasters, and a microfiber towel.
Ensure your bats are safely stowed inside padded internal scabbards away from sharp shoe spikes or heavy helmet grilles. Perform a final spot-check to make sure all gear is completely dry, clean, fresh, and ready for action. Stepping onto the field with a fully prepared kit bag gives you the mental edge and physical protection required to perform at your absolute peak.
Pre-season preparation is about far more than just hitting balls in the nets—it is about ensuring every single piece of equipment in your bag operates at peak performance when match day arrives. By systematically auditing your cricket bats, upgrading worn protective armor, replacing shoe spikes, and maintaining proper gear hygiene, you safeguard yourself against preventable injuries and give yourself the ultimate platform to perform. Take the time to audit your kit today, enter the season with total confidence, and make every match count!
Final Summary
Pre-season preparation is about far more than just hitting balls in the nets—it is about ensuring every single piece of equipment in your bag operates at peak performance when match day arrives. By systematically auditing your cricket bats, upgrading worn protective armor, replacing shoe spikes, and maintaining proper gear hygiene, you safeguard yourself against preventable injuries and give yourself the ultimate platform to perform. Take the time to audit your kit today, enter the season with total confidence, and make every match count!
Shop Now at - www.Heegasports.com
Related posts
 Ordering Cricket Equipment for a Club or Academy: An Overseas Buyer's ChecklistOrdering cricket equipment for your club or academy from overseas? Use this checklist for bats, protective gear, quantities, samples, shipping and quotations.
 The Ultimate Knocking-In & Bat Maintenance Guide for Overseas CricketersLearn how to knock in and maintain your cricket bat for overseas cricket, including oiling, moisture control, storage, repairs, travel, and seasonal care.
 How to Pack and Organize Your Cricket Kit Bag to Protect Your Gear All Season LongLearn how to pack and organize your cricket kit bag properly to protect your bat, gloves, pads, helmet, shoes, and other gear throughout the cricket season.