Cricket bat grip replacement: a new grip in five minutes
Why a worn grip costs runs
A grip goes bald before it tears. The pattern wears flat where your top hand sits. The rubber turns shiny. Then, on a hot afternoon, the handle starts to turn in your hands on anything hit off the toe or the edge.
You answer that by squeezing harder. A tight grip slows the hands, the bottom hand takes over, and the drive you meant to hit along the ground goes up in the air. Nothing about the blade has changed. The handle has just stopped doing its job.
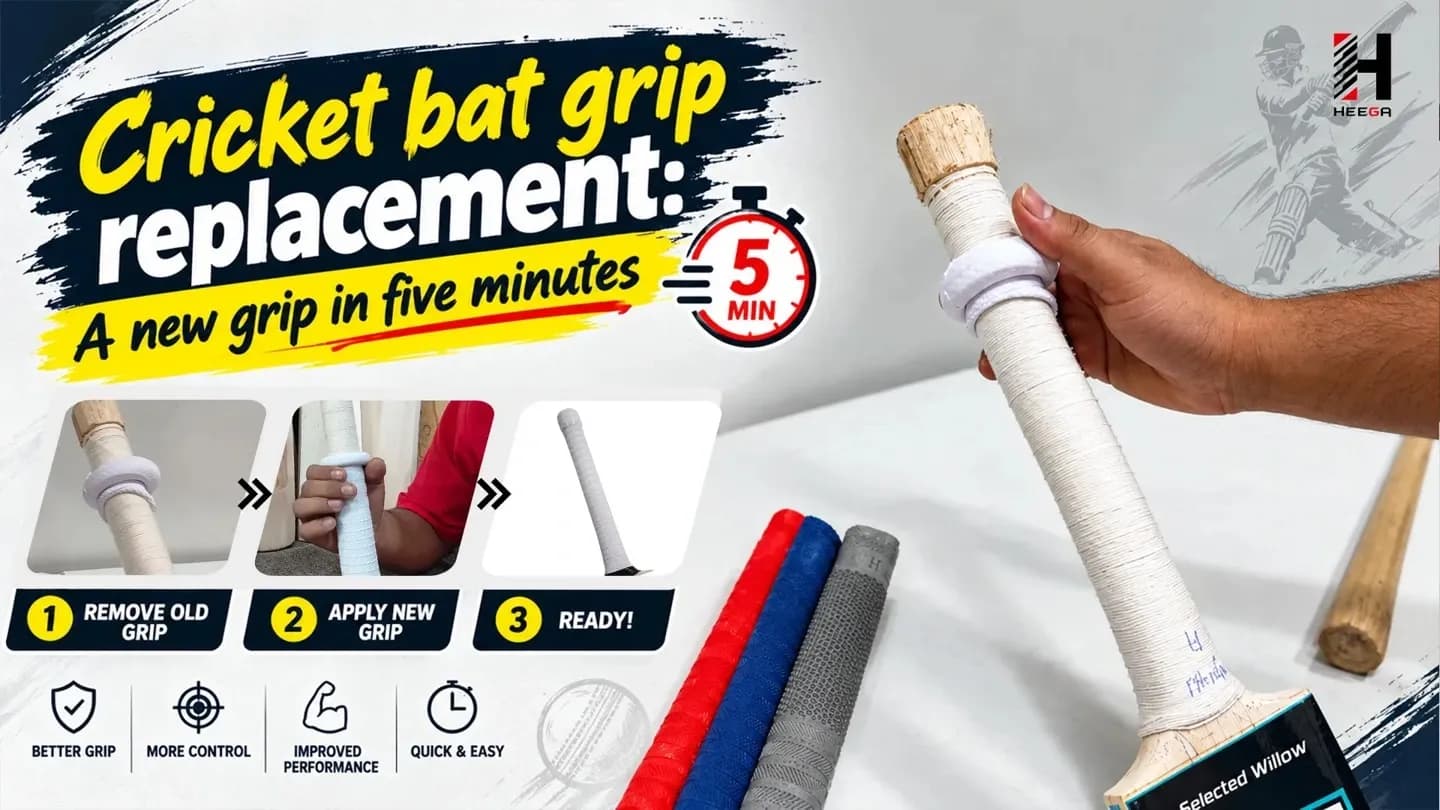
Cricket bat grip replacement is the cheapest fix in the kit bag. With a cone and a fresh grip it takes about five minutes, and most of that time goes on cutting the old one off. Here is how we do it in the workshop, in the order we do it.
What you need on the table
A new rubber grip. A grip cone. A sharp blade or a pair of scissors. A short strip of handle tape or insulation tape. A dry cloth.
The cone is the one tool people try to skip. Without it you end up dragging the grip down the handle by hand, and it twists, bunches and stretches unevenly. A wooden cone stretches the grip open in one even ring and lets it roll on straight. Our wooden grip cones are the same shape we use on the bench.
Taking the old grip off
Stand the bat with the toe on the floor and the handle towards you. Hold the blade nearly flat to the handle and make one long, shallow cut from the top of the grip down to the bottom. Cut away from your body.
Shallow is the word that matters. Under the grip is a layer of twine bound around the cane and set in glue. If the blade bites through that twine, the binding can start to lift, and then you have a handle repair, not a grip change.
Peel the old grip off. Pull away any old tape at the bottom edge. Wipe the handle with the dry cloth so there is no sand, sweat salt or rubber dust left on it.
Now look at the twine. It should be tight all the way round, with no loose end at the top and no gap near the shoulders. If one end has lifted, put a small dab of wood glue under it, press it down and leave the bat overnight. Fit the grip the next day. That is the one case where this job takes longer than five minutes.
The order of layers
From the inside out, a handle is built like this:
- The cane handle itself, set into the blade at the splice.
- Twine, wound tight and glued, which holds the cane pieces together and gives the grip something to bite on.
- An optional underlay: a single wrap of thin tape, or a second grip, if you want a thicker handle.
- The outer grip, the one your gloves actually touch.
Never put the grip straight on bare cane with no twine. It slides, and the cane is not protected. Never wrap thick layers of tape under the grip to bulk it up either. Tape bunches, and you feel every ridge through the glove. If you want more thickness, a second grip is the clean way to get it.
Rolling the new grip on with a cone
Take the new grip and push its open end over the narrow tip of the cone. Roll it down the cone, a little at a time, until the whole grip sits stretched on the cone with a short lip at the wide end. Keep the pattern straight as you go. If it spirals on the cone, it will spiral on the handle.
Turn the cone over and set its wide end flat on the top of the bat handle. Line the two up so the cone sits square, not tilted. Hold the cone and the handle together with one hand.
With the other hand, roll the lip of the grip off the cone and onto the handle. Then keep rolling downwards, working round the handle evenly, so the grip unrolls in a ring rather than being dragged from one side. It goes on in under a minute once it starts.
When the grip is fully on, run your palm down it from top to bottom to settle any small twist. The bottom edge should sit where the handle goes into the shoulders of the blade.
If your grip has an open top, trim it with scissors about 5 mm past the end of the handle and tuck that lip over the top. Finish with one tight ring of tape round the bottom edge, half on the grip and half on the handle. That ring stops the edge rolling up when the bat is pushed in and out of a cover all season.
One grip or two
One grip suits most players. Use two when the handle is too thin for your hands.
The check is simple. Hold the bat in your normal stance without gloves. If your fingertips wrap round and press into the base of your palm, the handle is thin for you, and a second grip will let you hold it with less squeeze. If your fingers only just meet the thumb, stay with one.
Fit the first grip, tape its bottom edge, then roll the second over it with the cone in exactly the same way. The second one is stiffer to roll because it is going over rubber, so go slowly.
A second grip also adds weight at the top of the bat, roughly the weight of the grip itself. That makes the pickup feel a touch lighter in the hands even though the scale says the bat is heavier. Some players like that. A junior with a light bat usually does not need it, and one thin grip keeps the handle small enough for small hands.
Texture: what to pick
Grips come in a few patterns. A ripple or coil pattern gives more hold, which helps in humid weather or in tennis-ball matches played without gloves. A smoother chevron or scale pattern feels softer and suits players who hold the bat loosely. Neither is wrong. Pick the one that stops the handle turning in your hands, and change it again when the pattern under your top hand has worn flat.
How we fit grips before dispatch
Every bat that leaves our Meerut workshop goes out with one grip already on. We check the twine on the handle first, fit the grip with a cone so the pattern runs straight, and tape the bottom edge. Then we hold the blade and twist the grip by hand. If it moves on the handle, it comes off and goes on again.
That first grip is meant to last a good part of a season. Players who bat a lot with a season ball usually wear through it sooner, mostly under the top hand.
When the handle needs more than a grip
Sometimes the old grip comes off and the problem is underneath. The twine is cut through, the cane has a crack near the splice, or the handle moves when you flex the blade against your knee. A new grip will hide that for a week, not fix it. A loose or cracked handle needs to be replaced, and that is a bench job with clamps and glue, not a five-minute one. Our replacement cane bat handles are the same handles we fit when we build a bat.
You can order a fresh grip from our rubber bat grips page.
Related posts
 Batting Gloves for Cricket: How Finger Design, Palm Materials and Grip Texture Affect Bat ControlDiscover how cricket batting gloves, finger design, palm materials and grip texture influence bat control, comfort, protection and batting performance.
 Cricket Shoes Explained: How Stud Patterns, Grip and Sole Design Affect Performance on Different PitchesLearn how cricket shoes, stud patterns, grip and sole design affect traction, stability, comfort and performance on grass, turf and artificial pitches.
 Why Batting Gloves Matter: Understanding Protection, Grip, Flexibility & Hand ComfortLearn why batting gloves matter for protection, grip, flexibility and comfort, plus how to choose the right cricket batting gloves for your playing level.