Kashmir Willow Cricket Bat Care: How to Protect Your Bat and Extend Its Playing Life

Kashmir Willow Cricket Bat Care: How to Protect Your Bat and Extend Its Playing Life
Meta Description: Learn how to properly knock in, oil, clean, and store your Kashmir Willow cricket bat to extend its playing life and keep it match-ready season after season.
Introduction
If you have ever stepped up to the crease, you know that a cricket bat is never just another piece of equipment sitting in your kit bag. It is an essential extension of your arms, carefully balanced to give you timing, power, and control with every stroke. Among all the timber choices available to players today, Kashmir Willow holds a special place. It is renowned worldwide for offering exceptional durability, reliable performance, and fantastic value for money. Whether you are a beginner taking your first steps at a local academy or an experienced club cricketer playing long, demanding seasons, a good Kashmir Willow blade is a trusty companion.
However, even the toughest natural timber has its limits. A cricket bat is constantly subjected to severe impact, facing hard leather balls traveling at high speeds. Without proper care, even a high-grade Kashmir Willow bat can suffer from surface cracks, toe split, handle weakening, or moisture decay long before its time. The secret to making your bat last season after season lies in establishing smart, consistent maintenance habits from the very day you bring it home.
Taking care of your bat doesn't require a degree in woodworking, nor does it demand hours of painstaking effort every single day. It simply takes a clear understanding of how natural wood reacts to impact, moisture, heat, and stress. In this comprehensive guide, we will walk you through every step of protecting your Kashmir Willow cricket bat, from initial preparation and daily maintenance to seasonal storage and emergency repairs, ensuring your blade remains in prime playing condition for as long as possible.
Understanding Kashmir Willow Timber
To care for your bat effectively, it helps to understand what makes Kashmir Willow unique. Harvested primarily from the lush valleys of the Kashmir region, this timber is naturally denser and slightly heavier than its English Willow counterpart. Because the trees grow in different climatic conditions, Kashmir Willow features a tighter, firmer grain structure and a distinct reddish-brown tint.
This natural density is both a blessing and a responsibility for cricketers. On one hand, it gives the bat impressive structural toughness, allowing it to withstand heavy usage and rougher playing conditions. On the other hand, because the wood fibers are dense and tightly packed, they require careful preparation to reach peak performance. The wood needs to be conditioned so that it can absorb repetitive ball impacts without splintering or shock-fracturing.
Additionally, like all natural timbers, Kashmir Willow is an organic material that breathes. It absorbs moisture when exposed to damp conditions and loses its internal oil content when subjected to heat or dry air. When wood loses its natural moisture balance, it becomes brittle and prone to cracking under severe stress. Conversely, when it absorbs excessive water, the fibers swell, soften, and rot. Achieving and maintaining the right balance through proper oiling, protection, and storage is the absolute foundation of long-term bat care.
Preparing a New Bat: Knocking In and Oiling
The journey of protecting your cricket bat starts long before you walk out to face your first delivery in a competitive match. Unboxing a brand-new Kashmir Willow bat is always exciting, but taking it straight to the nets or onto a match pitch with a brand-new leather ball is one of the quickest ways to ruin it permanently. Raw, unconditioned wood fibers cannot absorb the sharp point-impact of a hard ball without cracking or denting severely.
The Role of Raw Linseed Oil
Before a bat faces any physical impact, its timber needs to be conditioned with raw linseed oil. Oiling preserves the wood's natural flexibility, prevents it from drying out, and creates a slight barrier against external moisture.
To oil your bat properly, start by making sure the blade surface is clean and free of dust. Pour a small, coin-sized amount of raw linseed oil directly onto the middle of the face. Using a soft cotton cloth or your fingers, spread the oil evenly across the entire face, moving upwards toward the shoulders and downwards toward the toe. Make sure to apply a thin layer along the rounded edges as well.
There are two critical areas you must avoid when oiling: the splice where the handle meets the blade and the rubber grip. Oil seeped into the splice can dissolve the specialized glue holding the handle assembly together, causing the handle to loosen over time. Similarly, getting oil on the grip makes it slick and unusable.
Always remember that less is more when it comes to oiling. Over-oiling is just as harmful as under-oiling, as excess oil saturates deep into the timber, making the bat heavy, deadening the ping, and softening the wood to the point where it deep-dents easily. After applying a light coat, lay the bat down horizontally on its back and let it rest in a cool, dry area for 24 hours to let the timber absorb the oil naturally. Repeating this process two to three times before knocking in creates an ideal baseline for your new blade.
The Art of Knocking In
Knocking in is the essential process of compressing and hardening the soft outer wood fibers of the blade so they can withstand ball impacts. Skipping or rushing this process is the leading cause of premature bat breakage.
To knock in your bat correctly, you will need a specialized hardwood bat mallet or a heavy wooden ball mallet. Hold the bat securely and begin gently striking the face of the blade with the mallet. Start with moderate force in the central hitting zone, slowly working your way across the entire face.
Pay special attention to the edges and the toe, as these are the most vulnerable parts of any cricket bat. When working on the edges, never strike them directly at a 90-degree angle, as this can shear the wood fibers right off. Instead, strike the edges at a subtle 45-degree angle, gradually rounding them off and compressing the timber inward toward the face.
Knocking in is a gradual process that requires patience. A proper knocking-in routine should take anywhere from four to six hours in total, spread over several days. You can test if your bat is ready by pressing the side of a seam from a used leather ball firmly into the face. if the seam leaves a visible line or dent, the wood is still too soft and requires further malleting. Once the face resists denting from the mallet and ball seam, the surface fibers are sufficiently compacted.
The Phased Transition to Match Play
Even after completing hours of malleting, you should not jump straight into playing against bowler-paced delivery with a new leather ball. Transition your bat into active service through progressive stages:
First, spend a few sessions in the nets facing gentle throw-downs using old, soft, well-used leather cricket balls. This allows the blade to adjust to real impacts across its surface without extreme stress. Next, move on to light bowling sessions, continuously inspecting the face and edges for deep marks or unusual indentations after every few overs. Once the bat passes these stages without showing any signs of surface stress or deep seam marks, it is fully conditioned and ready for competitive match play.
Shielding Vulnerable Areas: Toe Guards, Anti-Scuff Sheets, and Edge Protection
While proper oiling and knocking in strengthen the wood from within, applying external protective barriers provides a crucial second line of defense against physical wear and harsh environmental elements.
Protecting the Bat Toe
The toe of a cricket bat takes a beating every single time you play. It comes into direct contact with damp turf, harsh concrete practice pitches, and hard yorker-length deliveries. Furthermore, players naturally tap their bats on the crease while waiting for the bowler, sending shockwaves through the bottom timber. Unprotected toes easily absorb groundwater, causing the wood to swell, delaminate, and split open along the bottom grains.
Fitting a high-quality rubber toe guard is one of the smartest investments you can make for a Kashmir Willow bat. A rubber toe guard creates a solid physical barrier that seals the bottom grain from moisture absorption and absorbs the direct shock of crease tapping. When fitting a toe guard, clean the bottom surface thoroughly, apply a thin layer of flexible rubber contact adhesive, press the guard firmly into position, and let it cure completely for 24 hours.
If you prefer not to add the slight bottom weight of a rubber toe guard, applying a specialized liquid toe sealant or clear toe tape offers an alternative layer of protection against water ingress and direct abrasion.
Applying Anti-Scuff Sheets
An anti-scuff sheet is a clear, durable polyurethane film that adheres directly to the face and edges of the blade. It acts as an armor coating that holds the wood timber together under intense impact.
Anti-scuff sheets serve several key purposes: they prevent ball seams from tearing up the wood fibers, reduce surface cracking, hold minor splinters in place, and significantly slow down the rate at which moisture evaporates or enters the front of the bat.
When applying an anti-scuff sheet, make sure the bat face is entirely clean, dry, and free of excess surface oil. Peel back the backing paper slowly and line up the sheet centered on the face. Using a soft cloth or a roller, smooth the sheet down from the middle outwards to eliminate air bubbles. Wrap the flexible sides neatly around the edges to give your bat total front-and-side protection.
Edge Tape for Additional Reinforcement
The edges of a bat are particularly susceptible to thick edge-catches and mistimed shots. Applying reinforced fiberglass edge tape along the sides over your anti-scuff sheet adds localized strength to these high-impact zones. Fiberglass tape absorbs sideways stress, preventing wood fibers from feathering or peeling away after mistimed shots.
Daily Cleaning and Regular Maintenance Routines
Cricket is played outdoors in varying conditions, meaning your bat will routinely encounter dirt, red dust, grass juice, ball polish, and moisture. Allowing grime to build up on raw wood creates long-term damage, hides developing cracks, and degrades the natural finish of your equipment. Developing a quick five-minute cleaning habit after every match or training session will dramatically extend your bat's life.
Post-Match Cleaning Habits
At the end of every match or practice session, take your bat out of your bag and inspect it thoroughly. Use a soft microfibre towel or a soft-bristled brush to remove dry dirt, grit, and grass clinging to the toe and lower blade. Never use wet cloths, running tap water, or liquid household detergents to clean your bat. Water applied directly to exposed wood penetrates deep into the grain, causing internal swelling, timber rot, and localized warping.
If there are tough ball marks or red leather polish stains stuck to the face, let the wood dry completely first. Then, take fine-grade sandpaper (180 to 220 grit) and rub very lightly over the mark strictly following the direction of the wood grain. Never sand across the grain, as this creates micro-scratches that weaken the surface fibers. Once the mark is buffed away, wipe off the wood dust and apply a tiny drop of raw linseed oil to recondition the newly exposed timber.
Seasonal Sanding and Re-Oiling
Over the course of a long cricket season, your bat will naturally lose a portion of its moisture balance due to dry weather and constant use. Doing a mid-season or end-of-season refurbishment keeps the willow fresh and resilient.
To refurbish your bat, gently peel off old anti-scuff sheets or peeling edge tape. Lightly sand the entire face, edges, and back with fine sandpaper to remove surface dirt, old dried oil residue, and minor splinters. Once the wood is smooth and clean, apply a fresh, light layer of raw linseed oil across the face and edges. Allow the bat to dry horizontally for 24 to 48 hours before applying a fresh anti-scuff sheet and brand-new edge tape. This routine refreshes the wood, seals minor surface flaws, and prepares the bat for many more overs of hard play.
Proper Storage and Climate Management
You can follow every knocking-in and oiling rule perfectly, but if you store your bat incorrectly between matches, it can suffer irreparable structural damage without ever hitting a ball. Natural wood continually expands and contracts in response to changes in ambient temperature and humidity. Understanding how to manage your bat's storage environment is essential.
Protecting Against Moisture and Humidity
Moisture is one of the fastest destroyers of cricket equipment. Leaving a cricket bat inside a zipped, unventilated kit bag alongside sweaty batting pads, damp socks, and wet towels creates a humid greenhouse environment. Under these conditions, the wood quickly absorbs ambient moisture, leading to handle glue breakdown, timber swelling, and black mold growth that rots the core of the bat.
After every session, always take your bat out of your main kit bag as soon as you get home. Let it air out in a well-ventilated room. Ensure that your bat cover is dry before sliding the bat inside. If your kit bag or cover gets soaked during a rain-affected match, take the bat out immediately, wipe away surface wetness with a dry towel, and let it dry naturally away from sealed bags.
Avoiding Extreme Heat and Dryness
While excessive moisture causes rot, excessive heat causes extreme dryness, making wood brittle like dry glass. Never leave your cricket bat inside the trunk of a car parked under direct sunlight, near glass windows exposed to harsh afternoon sun, or next to home heating radiators and fires.
Temperatures inside a closed car trunk during summer can easily exceed high levels, baking the natural oils right out of the timber. When a bone-dry, heat-stressed bat hits a hard cricket ball, the unyielding fibers shatter instantly, leading to major vertical cracks or complete blade snapping. Always keep your bat in a cool, shaded environment where temperatures remain stable.
Correct Storage Positioning
How you place your bat during long periods of non-use—such as during the off-season—matters immensely. Always store your bat lying flat horizontally on a shelf or standing vertically upside down resting on its handle in a dedicated bat rack. Avoid leaning a bat at an angle against a wall for months at a time, as continuous off-center pressure combined with seasonal gravity can cause a subtle curve or warp along the blade line. Keep it inside a padded, breathable canvas bat cover in a room with balanced humidity.
Handle, Grip, and Rubber Maintenance
While most care discussions center on the wooden blade, the handle is the engine room of the cricket bat. A damaged or poorly maintained handle ruins shot feel, transfers painful shock vibrations directly into your hands and wrists, and reduces your stroke control.
Caring for the Cane Handle
Modern cricket bat handles are constructed using multiple pieces of premium cane spliced together with thin rubber strips. This composite structure provides flex, power transfer, and shock absorption.
Regularly check the top of the blade where the handle enters the wood (the splice area). Look for any signs of hairline cracking, wood separation, or loose string binding. The thread binding wrapped around the handle provides structural tension; if it begins to unravel, re-wrap it tightly with heavy-duty twine and secure it with clear varnish or specialist glue.
If you ever feel a distinct "clicking" sound or double-vibration feeling in your hands when hitting the ball, your handle may have developed an internal split or glue separation. Stop using the bat immediately and take it to a professional repairer for a handle reset or replacement before the damage spreads into the main shoulders of the blade.
Grip Selection and Replacement
The rubber grip fitted over the handle is your sole point of contact with the bat. Over time, sweat, hand oils, dirt, and UV exposure degrade rubber, making it smooth, slippery, hard, or brittle.
A worn-out grip forces you to squeeze the handle tighter, tensing your forearm muscles and destroying your natural stroke play. Replace your grip as soon as it shows smooth patches, tears, or starts twisting on the handle during shots.
Replacing a grip is simple and inexpensive:
- Peel off the old, worn rubber grip and cut away any leftover adhesive tape.
- Check that the underlying string binding is tight, smooth, and dry.
- Roll a new rubber grip onto a plastic grip applicator cone.
- Place the wide end of the cone over the top of the handle and slide the grip down smoothly into position.
- Secure the top and bottom edges of the new grip with electrical insulating tape to prevent sliding or rolling up during play.
Using two grips or adding a rubber grip cone underneath can also help players who prefer a thicker handle feel or require extra shock absorption against pace bowling.
Identifying and Handling Cracks Early
No matter how meticulously you care for a Kashmir Willow bat, facing thousands of high-speed impacts means that surface marks and minor cracks will eventually appear. The key to long-term bat survival is distinguishing between minor cosmetic wear and serious structural damage, dealing with problems as soon as they arise.
Cosmetic Wear vs. Structural Cracks
It is completely normal for a well-used bat to develop light surface seam marks, minor indentations, and tiny hairline cracks running along the direction of the grain on the face. These are natural signs of wood flexing and do not compromise the bat's safety or performance.
However, structural cracks require immediate intervention. Warning signs include:
- Deep cracks running across the grain horizontally.
- Cracks opening up wide along the outer edges or toe.
- Splintering timber that lifts away from the main blade surface.
- Cracks running around the handle splice or shoulder areas.
DIY Quick Fixes for Minor Splinters
For small surface splinters or minor edge cracks, you can perform quick, effective repairs at home before the damage expands:
- Gently flex the crack open slightly using a thin plastic tool.
- Work a high-quality PVA wood glue deep into the split using a toothpick.
- Press the wood fibers back together firmly, wiping away any excess glue squeezed out onto the surface.
- Clamp the area tightly using a wood clamp or wrap it tightly with heavy-duty electrical tape.
- Allow the glue to cure completely for 24 to 48 hours.
- Once cured, lightly sand the area smooth, re-oil lightly, and cover with a patch of fiberglass tape or an anti-scuff sheet.
Knowing When to Seek Professional Repairs
If your bat suffers a major toe split, a broken handle, or deep longitudinal cracks running deep into the core, do not attempt temporary home fixes with instant superglues or home hardware nails. Superglue cures brittle and shatters under ball impact, while screws and nails ruin the internal timber structure beyond recovery. Take your bat to a professional craftsman who can properly re-bind, re-sleeve, or fit a fresh handle, extending your blade's useful playing life by several seasons.
Smart Playing Habits to Prevent Equipment Abuse
In addition to physical maintenance routines, adopting sensible playing habits goes a long way toward keeping your Kashmir Willow bat intact. How you handle your bat on and off the field directly influences its longevity.
Avoid Non-Cricket Impacts
A cricket bat is specifically designed to strike leather or tennis cricket balls on its prepared face. It is not built to strike ground rocks, heavy equipment, or metal stumps. Avoid using your bat to clear debris off the pitch, scrape dirt out of your shoe cleats, or hit metal boundary stakes.
Additionally, avoid tapping the toe of your bat aggressively on hard concrete practice pitches during net sessions. If you are batting on synthetic or concrete surfaces, always make sure your bat has a durable toe guard fitted to cushion the constant shock.
Mind the Type of Balls You Hit
Kashmir Willow bats are designed for standard cricket play, but using ultra-hard, low-quality practice balls or wet, heavy rubberized balls can cause unexpected damage. Heavy, waterlogged balls put immense strain on the blade shoulders and handle splice, increasing the risk of structural failure. In practice sessions, try to use quality, dry leather balls or appropriate safety balls that match your training goals without putting unfair stress on your equipment.
Essential Bat Care Routine
To keep your maintenance schedule simple and organized, follow this straightforward routine throughout the cricket season:
After Every Match or Practice Session
- Wipe down the entire blade with a dry microfibre towel to clear off dust, mud, and grass.
- Inspect the toe, edges, and face carefully for new hairline cracks or lifted splinters.
- Remove the bat from your main kit bag and store it in a dry, well-ventilated area.
Every Few Weeks
- Inspect the rubber grip for tears, smooth spots, or slipping.
- Check the toe guard and anti-scuff sheet edges to ensure they aren't peeling away.
- Re-tape any loose or frayed edge protection with fresh fiberglass tape.
Seasonal Overhaul (Pre-Season & Post-Season)
- Remove old protective sheets, sand down surface scuffs lightly along the grain, and clean the face.
- Apply a light coat of raw linseed oil and let it absorb horizontally for 24 to 48 hours.
- Re-apply a fresh toe guard, anti-scuff sheet, and grip so your bat is fully prepped for action.
Summary
A Kashmir Willow cricket bat is a wonderful investment that offers the perfect blend of performance, strength, and value. While natural wood will inevitably show signs of hard-fought matches over time, taking proactive care of your blade ensures that wear and tear remain purely cosmetic rather than destructive. By properly oiling and knocking in a new bat, fitting protective guards, keeping moisture and extreme heat away, and fixing minor surface cracks early, you protect your equipment and give yourself full confidence every time you step up to the crease. Treat your bat with care off the field, and it will reward you with glorious shots on it.
Shop Now at Heega Sports
Related posts
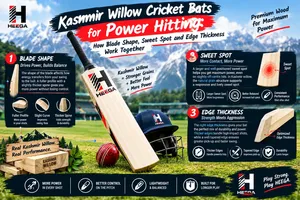 Kashmir Willow Cricket Bats for Power Hitting: How Blade Shape, Sweet Spot and Edge Thickness Work TogetherLearn how Kashmir willow cricket bat blade shape, sweet spot position, and edge thickness work together to support powerful shots, control, and balance.
 Kashmir Willow Cricket Bats: How Wood Density, Grain Patterns and Moisture Affect PerformanceDiscover how Kashmir Willow cricket bat density, grain patterns and moisture affect bat weight, balance, durability, and batting performance.
 Kashmir Willow Cricket Bats Explained: How Wood Characteristics Influence Bat Feel and PerformanceDiscover how Kashmir willow characteristics affect cricket bat feel, pickup, shot response, durability, and value, with tips for choosing the right bat.