The Ultimate Knocking-In & Bat Maintenance Guide for Overseas Cricketers
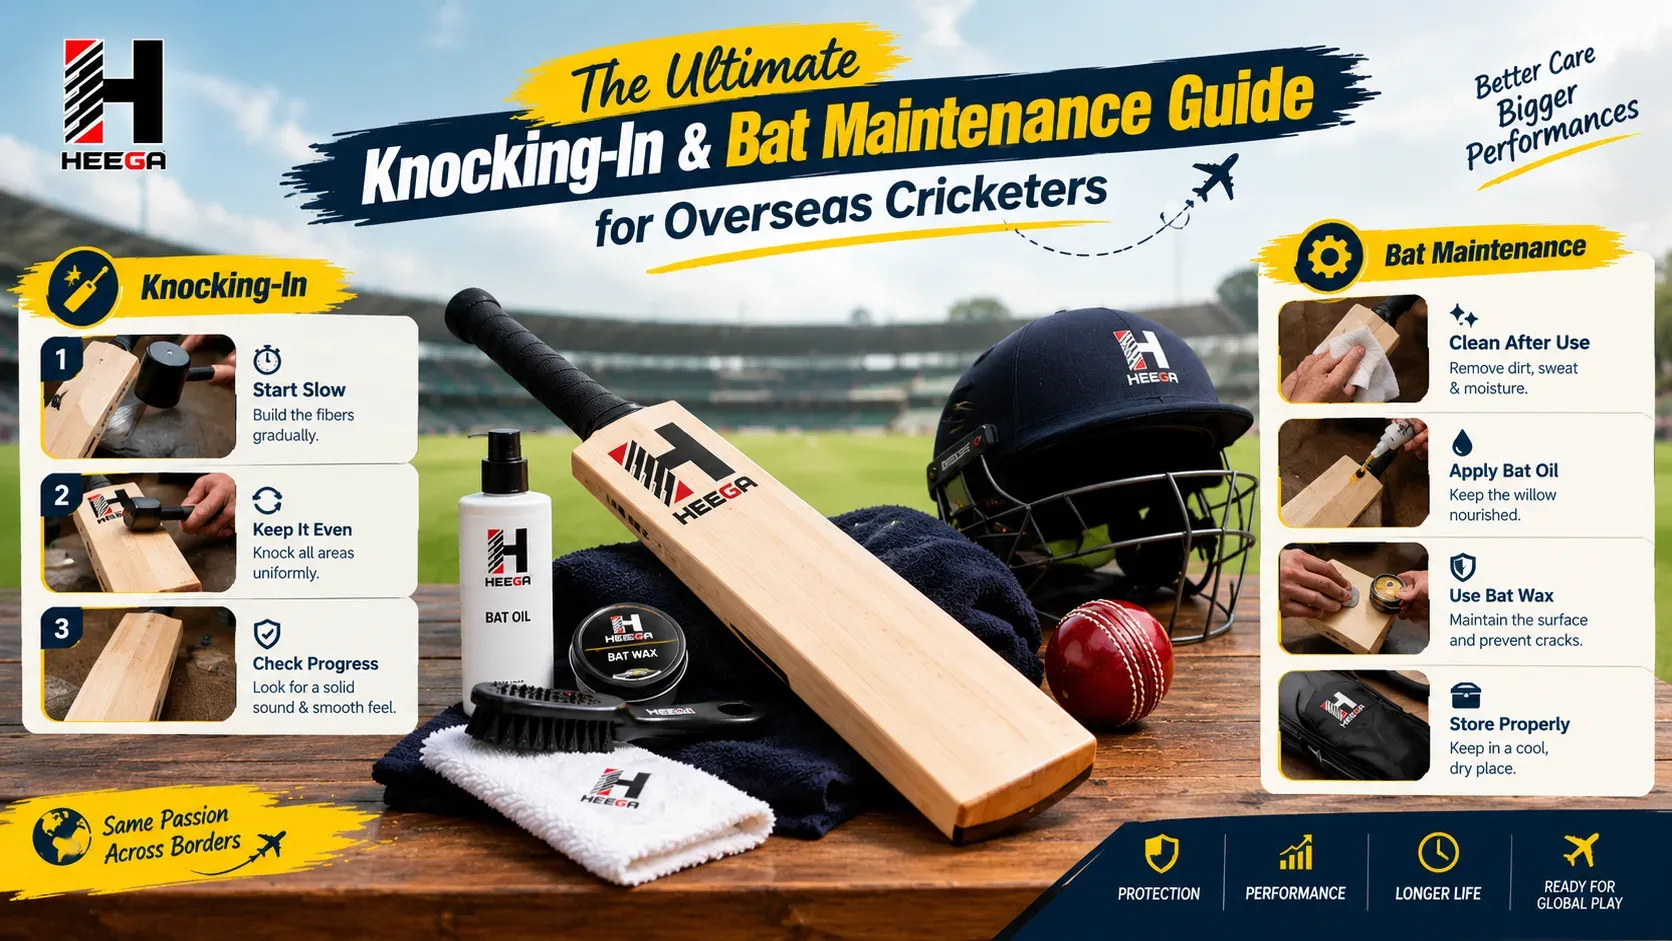
Introduction: Why Bat Preparation Matters for Overseas Cricket
Buying a new cricket bat is exciting, but taking it straight into a competitive match is not always the best idea.
A cricket bat needs the right preparation before it faces repeated impacts from a hard cricket ball. This is particularly important for overseas cricketers because travelling and playing in different countries can expose the bat to changes in temperature, humidity, pitch conditions, and storage environments.
Proper knocking-in helps prepare the willow for regular use, while good maintenance helps keep the bat in suitable condition throughout the season.
Whether you are a beginner playing your first season overseas, a club cricketer travelling for a tournament, or a professional managing several bats, the basic principle remains the same:
A cricket bat performs best when it is properly prepared, regularly inspected, and stored correctly.
This guide explains how to knock in a cricket bat, how to maintain it during the season, how to protect it while travelling overseas, and which common mistakes can shorten its useful life.
What Does Knocking-In a Cricket Bat Mean?
Knocking-in is the process of gradually preparing the bat's willow to withstand the impact of a cricket ball.
A new bat can have relatively vulnerable areas, particularly around the edges and toe. Gradually introducing impact helps the surface become better prepared for regular leather-ball use.
Traditionally, knocking-in is carried out with a cricket bat mallet before the bat is used against a hard cricket ball.
The objective is not simply to hit the bat as hard as possible.
It is about gradual and controlled preparation.
A player should never treat knocking-in as a competition to see how quickly the bat can be made match-ready.
Why Is Knocking-In Important?
A properly prepared bat is better suited to handling the repeated impact associated with cricket.
Knocking-in can help:
- Prepare the willow surface
- Gradually strengthen the edges
- Prepare the sweet-spot area
- Reduce the risk of premature surface damage
- Make the transition to ball use more controlled
- Give the player an opportunity to inspect the bat before competitive use
However, knocking-in does not make a cricket bat indestructible.
Even a well-prepared bat can develop cracks, edge damage, toe damage, or other issues if it is used against unsuitable balls or handled poorly.
Does Every Cricket Bat Need the Same Knocking-In Process?
No.
This is an important point.
Different bats can have different preparation requirements depending on their willow, construction, pressing, manufacturer's preparation, and intended use.
Some bats may be supplied partially prepared, while others may require more traditional preparation.
Always check the manufacturer's instructions before beginning.
Do not assume that every cricket bat should receive exactly the same amount of oiling or knocking-in.
The general process can be similar, but the correct preparation depends on the individual bat.
What You Need to Knock In a Cricket Bat
Traditional bat preparation does not require a complicated collection of equipment.
You may need:
- Cricket bat mallet
- Suitable bat oil, if recommended
- Clean cloth
- Cricket ball
- Bat cover
- A clean, dry workspace
- Good lighting for inspection
The mallet is particularly important.
A proper bat mallet allows you to introduce controlled impact without immediately subjecting the bat to the full force of a fast bowler.
Step 1: Inspect the New Cricket Bat
Before doing anything else, inspect the bat carefully.
Look at:
- Face
- Edges
- Toe
- Back
- Handle
- Splice area
- Existing surface marks
- Any visible cracks or damage
A few natural marks or minor imperfections in willow are not automatically signs of a problem.
The purpose of the inspection is to understand the bat's starting condition.
If you notice significant damage or anything that looks unusual, contact the manufacturer or seller before beginning preparation.
Step 2: Check the Manufacturer's Preparation Instructions
This step is easy to overlook.
Some bats are supplied with specific preparation instructions.
The manufacturer may provide guidance regarding:
- Oiling
- Knocking-in
- Use of a mallet
- Ball testing
- Practice use
- Storage
- Toe protection
Follow those instructions where they differ from a general maintenance routine.
There is no benefit in applying a traditional preparation method blindly if the bat has already been treated by the manufacturer.
Step 3: Oiling the Bat When Required
Traditional English Willow bat preparation often includes the use of raw linseed oil or another suitable bat oil.
However, not every modern bat should automatically be heavily oiled.
If oiling is recommended for your bat, apply it carefully and according to the manufacturer's instructions.
The purpose of oiling is to help condition the willow rather than saturate it.
Basic Oiling Principles
- Use a small amount rather than excessive oil.
- Apply evenly to the appropriate areas.
- Avoid unnecessary oil on the splice and handle.
- Keep the bat horizontal where appropriate during the curing period.
- Allow sufficient time for the oil to absorb.
- Do not rush directly into heavy knocking-in.
Excessive oiling can be counterproductive.
When in doubt, follow the bat manufacturer's instructions.
Step 4: Allow the Bat to Rest After Oiling
If your bat requires oiling, give it time to absorb and settle before continuing with preparation.
Do not immediately begin aggressive knocking-in.
The exact waiting period can vary depending on the product and manufacturer's instructions.
During this stage, keep the bat in a suitable dry environment.
Avoid:
- Direct sunlight
- Extreme heat
- Damp rooms
- Wet surfaces
- Closed vehicles
- Excessive temperature changes
Step 5: Begin Knocking-In With the Bat Mallet
Once the bat is ready, begin the knocking-in process gradually.
Start with controlled impacts around the main hitting area.
Do not immediately attack the edges.
The initial objective is to introduce repeated, moderate impacts rather than maximum force.
Move across the face methodically.
Work gradually around the central playing area while avoiding careless strikes against vulnerable areas.
How Hard Should You Hit the Bat?
This is where many players make mistakes.
Knocking-in is not about hitting the bat as hard as possible.
Start gently.
Then gradually increase the impact as the bat becomes prepared.
A useful way to think about it is:
Gentle impact → controlled impact → stronger impact → ball testing
rather than:
New bat → maximum force
The edges and toe deserve particular care because careless preparation can cause unnecessary damage.
How to Knock In the Cricket Bat Edges
The edges should be prepared gradually.
Do not strike the very edge aggressively from the beginning.
Instead:
- Begin near the inside portion of the edge.
- Gradually work closer to the outer edge.
- Increase impact slowly.
- Inspect the edge regularly.
- Stop if you notice unusual damage.
The goal is to prepare the edge without creating deep dents or cracks.
A patient approach is much safer than trying to complete the process in a single aggressive session.
How to Knock In the Cricket Bat Toe
The toe is another area that deserves attention.
It is particularly exposed because it can come into contact with the ground, yorkers, moisture, and accidental impacts.
When preparing the toe:
- Use controlled impacts.
- Avoid excessive force.
- Inspect the toe frequently.
- Make sure the bat is not being damaged by the preparation itself.
- Consider suitable toe protection where appropriate.
Toe preparation and toe protection are related, but they are not the same thing.
Knocking-in prepares the willow for impact.
A toe guard or other protection helps protect the lower part of the bat during use.
How Long Does Knocking-In Take?
There is no universal number of hours that applies to every bat.
The time required depends on:
- Willow type
- Bat preparation
- Manufacturer instructions
- Bat construction
- Amount of existing preparation
- Level of use
- Condition of the bat
A player should focus on the quality of preparation, not simply the number of hours spent with a mallet.
Rushing the process because you have a match tomorrow can create unnecessary risk.
The Ball-Test Stage
Once the bat has received sufficient controlled mallet work, you can gradually introduce ball impacts.
Start with gentle throws rather than immediately facing fast bowling.
For example:
- Underarm throws
- Gentle front-foot shots
- Controlled defensive strokes
- Light net sessions
Pay attention to how the bat responds.
Inspect the face and edges afterward.
If the surface is developing excessive indentations or damage, stop and reassess the preparation.
When Is a Cricket Bat Ready for Match Use?
A bat should be introduced into competitive cricket gradually.
Do not assume that a few minutes of hitting a ball means the bat is fully ready.
Before match use, it should have:
- Appropriate preparation
- Controlled ball testing
- No concerning damage
- Suitable edge preparation
- Suitable toe condition
- Proper grip and handle condition
If you are unsure, ask an experienced bat maker, coach, or the manufacturer for guidance.
English Willow Maintenance During the Season
English Willow generally benefits from careful maintenance.
During a season, regularly inspect:
- Face
- Edges
- Toe
- Splice
- Handle
- Grip
- Protective tape
- Toe guard
Look for changes after training and matches.
Small surface marks are not necessarily a reason to stop using a bat.
However, significant cracks, loose components, or structural damage deserve immediate attention.
Kashmir Willow Maintenance During the Season
Kashmir Willow is often associated with durability, but it still needs proper care.
The same basic principles apply:
- Keep the bat dry.
- Avoid unnecessary impacts.
- Check the toe.
- Inspect the edges.
- Store it properly.
- Use the correct ball.
- Avoid careless transportation.
A durable bat is not the same as an indestructible bat.
Good maintenance remains important.
Why Moisture Is a Major Concern Overseas
Overseas cricket can expose your bat to dramatically different environments.
A player may travel between:
- Humid regions
- Dry regions
- Rainy climates
- Cold conditions
- Hot conditions
Moisture is particularly important because cricket bats are made from natural timber.
A bat should not be stored in a wet kit bag or damp environment for long periods.
After playing in wet conditions:
- Remove the bat from the kit bag.
- Inspect the surface.
- Wipe away appropriate surface moisture.
- Allow it to remain in a dry, ventilated environment.
- Avoid aggressive heating.
- Store it properly once dry.
Never Dry Your Bat With Excessive Heat
This is one of the most important maintenance rules.
If your bat becomes wet, you may be tempted to place it directly beside:
- A heater
- A radiator
- A hair dryer
- Strong direct sunlight
- Another intense heat source
Avoid this.
Rapid or excessive heating can cause the timber to dry unevenly and may increase the risk of damage.
Natural, controlled drying in a suitable environment is generally the safer approach.
How to Maintain a Cricket Bat in Humid Countries
Humid environments can create a different set of challenges.
If you are playing in a humid climate:
- Keep the bat away from damp floors.
- Do not leave it sealed in a wet kit bag.
- Allow your equipment to ventilate.
- Keep the bat in a suitable protective cover.
- Inspect the toe and edges regularly.
- Avoid unnecessary exposure to rain.
The goal is not to remove all moisture from the environment.
It is to prevent prolonged exposure to unsuitable moisture conditions.
How to Maintain a Cricket Bat in Dry and Hot Countries
Hot climates require different precautions.
Avoid leaving your bat:
- Inside a parked car
- Near windows with intense direct sunlight
- Against hot metal surfaces
- In an extremely hot storage room
Extreme heat can affect natural timber and other bat components.
When travelling between training and accommodation, keep the bat protected and avoid unnecessary exposure to temperature extremes.
Cricket Bat Maintenance During Rainy Seasons
Rain can quickly turn a normal training day into a maintenance problem.
If the bat gets wet:
Do not continue using it carelessly.
Instead:
- Inspect it.
- Remove surface moisture appropriately.
- Allow it to dry naturally.
- Check the toe.
- Check the edges.
- Inspect for new cracks.
- Avoid using it until you are satisfied that it is suitable for continued play.
If the bat has suffered significant water exposure, professional inspection may be appropriate.
How to Protect the Cricket Bat Toe
The toe is one of the most vulnerable areas of a cricket bat.
It can suffer damage from:
- Yorkers
- Ground contact
- Wet pitches
- Damp storage
- Tapping the bat on hard surfaces
- Poor transportation
A suitable toe guard can provide an additional layer of protection.
However, a toe guard does not eliminate the need for good maintenance.
Players should still inspect the toe regularly.
How to Protect the Cricket Bat Edges
Edges can become damaged when the ball strikes outside the main sweet spot.
They can also be affected by:
- Net-session mishits
- Hard practice balls
- Poor preparation
- Ground contact
- Transportation
Some bats may use protective edge tape or other protective methods.
The important point is to inspect the edges rather than assuming they are fine because the face looks good.
Why Net Practice Can Damage a Cricket Bat
Net sessions can be harder on a bat than some players realize.
Players may face:
- Old cricket balls
- Wet balls
- Poor-quality balls
- Very hard balls
- High-speed bowling
- Repeated mishits
If you use a premium match bat in every practice session, its wear can increase significantly.
For serious players, maintaining a separate training bat can sometimes be a practical option.
How Often Should You Inspect Your Cricket Bat?
A quick inspection should become part of your routine.
Before Training
Check:
- Face
- Edges
- Toe
- Grip
After Training
Look for:
- New marks
- Cracks
- Edge damage
- Toe damage
Before a Match
Perform a more detailed inspection.
After Travel
Always inspect the bat after long-distance transportation.
This habit can help you notice small problems before they become larger ones.
How to Store a Cricket Bat Properly
When you are not playing, store the bat in a suitable environment.
A good storage area should be:
- Dry
- Clean
- Well maintained
- Away from excessive heat
- Away from direct sunlight
- Free from unnecessary moisture
Do not leave the bat permanently inside a closed kit bag.
If you are storing the bat for an extended period, remove it from the bag and inspect it periodically.
Should You Keep the Bat in a Cover?
A suitable bat cover can help protect the bat from dust, scratches, and accidental contact.
However, the cover should not become a way of trapping moisture.
If the bat is wet or damp, do not simply zip it into the cover and forget about it.
Allow the bat and cover to dry appropriately before long-term storage.
Cricket Bat Maintenance While Travelling Overseas
International travel requires extra care.
Your bat can experience:
- Long periods in luggage
- Temperature changes
- Rough handling
- Pressure from other equipment
- Humid hotel rooms
- Dry climates
- Airport transportation
Before travelling:
- Inspect the bat.
- Use a suitable bat cover.
- Keep it away from unnecessary pressure.
- Do not pack heavy equipment directly against it.
- Check the handle and grip.
- Make sure the toe is in good condition.
After arriving:
- Remove the bat from its travel environment.
- Inspect it.
- Allow it to settle in the new environment.
- Avoid immediately exposing it to extreme temperature changes.
Moving From One Climate to Another
This is especially important for overseas cricketers.
A player may travel from a cool climate to a hot and humid destination within a matter of hours.
Do not treat the bat as if nothing has changed.
Give the equipment time to adjust to its new environment.
Keep it away from:
- Direct heat
- Damp storage
- Extreme sunlight
- Wet ground
Regular inspection becomes even more important during international tours.
Cricket Bat Maintenance Checklist for Overseas Tours
Before leaving home:
- Inspect bat face
- Check edges
- Check toe
- Check grip
- Check handle
- Check bat cover
- Confirm preparation is complete
- Pack suitable maintenance accessories
After arriving:
- Inspect the bat again
- Check for travel damage
- Store it correctly
- Keep it away from extreme temperatures
- Avoid unnecessary moisture
- Prepare it gradually for local conditions
During the tour:
- Inspect after matches
- Remove wet equipment from the kit bag
- Check the toe
- Check edges
- Monitor cracks
- Maintain the grip
- Store properly
Common Cricket Bat Maintenance Mistakes
1. Using a New Bat in a Match Immediately
A new bat may need preparation before facing full-speed leather-ball bowling.
2. Hitting the Mallet Too Hard
Knocking-in should be gradual.
3. Over-Oiling
More oil does not automatically mean better preparation.
4. Ignoring Manufacturer Instructions
Every bat may have different preparation requirements.
5. Leaving the Bat in a Wet Kit Bag
Moisture should never be ignored.
6. Drying the Bat With Extreme Heat
Rapid heating can cause problems.
7. Using the Wrong Ball
Poor-quality or unsuitable balls can cause unnecessary damage.
8. Ignoring Small Cracks
Small damage should be inspected rather than repeatedly ignored.
9. Storing the Bat for Months Without Inspection
Long-term storage does not mean maintenance can stop.
10. Using a Match Bat for Every Training Session
Frequent net use can increase wear, especially when the equipment or balls are unsuitable.
Signs That Your Cricket Bat Needs Attention
Players should take action when they notice:
- A crack getting larger
- A loose handle
- Significant edge damage
- Toe separation
- A loose toe guard
- Damaged grip
- Structural movement
- Unusual vibration
- Major face damage
Not every mark requires professional repair.
However, structural problems should not be ignored.
If you are unsure whether a bat is safe or suitable to continue using, seek advice from an experienced bat repairer or manufacturer.
When Should You Repair a Cricket Bat?
Repairing a bat can sometimes extend its useful playing life.
Depending on the problem, repairs may involve:
- Grip replacement
- Toe guard replacement
- Edge protection
- Crack repair
- Handle repair
- Re-gluing
- Surface maintenance
The right repair depends on the severity and location of the damage.
A cosmetic mark and a structural crack are not the same thing.
Do not try to treat serious structural damage as a simple surface problem.
Should Beginners Learn to Maintain Their Own Bats?
Yes.
Beginners do not need to become professional bat repairers, but they should learn basic equipment care.
Every young or new cricketer should understand:
- How to store a bat
- How to keep it dry
- How to inspect the toe
- How to check the edges
- Why knocking-in matters
- Why wet kit should be removed
- Why extreme heat should be avoided
These habits can become part of normal cricket preparation.
Bat Maintenance Guide for Club Cricketers
Club players often play frequently enough for maintenance to become important.
A useful routine is:
After Each Match
Inspect the face, edges, toe, and handle.
Every Few Matches
Check the grip, protective tape, and toe guard.
During Rainy Weather
Pay extra attention to moisture.
Before Important Matches
Make sure the bat is fully prepared and free from concerning damage.
At Season End
Clean, inspect, and store the bat correctly.
Bat Maintenance Guide for Professional Cricketers
Professional players often have more than one bat and may travel extensively.
For them, maintenance should be systematic.
A professional setup may include:
- Primary match bat
- Backup match bat
- Training bat
- Multiple grips
- Bat covers
- Maintenance accessories
- Protective equipment
- Regular professional inspection
The advantage of having a structured system is that no single bat has to handle every training session and every match.
English Willow vs Kashmir Willow: Does Maintenance Differ?
The basic principles remain similar, but the characteristics of the willow can influence how the bat should be treated.
English Willow is generally softer and more performance-oriented, so careful preparation and handling are particularly important.
Kashmir Willow is generally denser and often chosen for durability, but it still requires proper preparation, storage, and inspection.
Neither should be treated as maintenance-free.
The manufacturer's instructions should always take priority over generic advice.
A Simple Seasonal Cricket Bat Maintenance Routine
Before the Season
- Inspect the bat.
- Confirm preparation.
- Check the grip.
- Check the toe.
- Check edges.
- Ensure your bat cover is usable.
During the Season
- Inspect regularly.
- Keep the bat dry.
- Protect the toe.
- Monitor cracks.
- Replace worn grips.
- Avoid unsuitable balls.
During Overseas Travel
- Protect the bat during transportation.
- Avoid extreme temperature exposure.
- Inspect after arrival.
- Adjust your storage routine to local conditions.
After the Season
- Clean the bat appropriately.
- Inspect for damage.
- Complete necessary repairs.
- Store in a suitable environment.
- Avoid leaving it forgotten in a closed kit bag.
The Golden Rules of Cricket Bat Maintenance
If you remember nothing else, remember these rules:
1. Prepare the bat before serious use.
2. Follow the manufacturer's instructions.
3. Knock in gradually, not aggressively.
4. Keep the bat away from excessive moisture.
5. Never use extreme heat to dry it.
6. Inspect the toe and edges regularly.
7. Use suitable cricket balls.
8. Store the bat properly.
9. Repair serious damage early.
10. Give your bat extra attention when travelling between climates.
These simple habits can make bat care much easier throughout a cricket season.
Final Thoughts
A cricket bat is an important investment, and looking after it should be part of every player's routine.
For overseas cricketers, bat maintenance becomes even more important because the equipment may experience different climates, pitches, travel conditions, and storage environments throughout the season.
Knocking-in should be approached as a gradual preparation process rather than something to rush before a match. After that, regular inspection, moisture control, suitable storage, careful transportation, and timely repairs all play a role in keeping the bat in good condition.
Beginners should learn these habits early. Club players should make them part of their weekly routine. Professionals and serious overseas players should treat bat maintenance as part of their overall match preparation.
A well-maintained bat will not last forever, but proper preparation and sensible care can help you get the best practical life and performance from it.
Your bat does a lot of work in the middle.
Give it the care it deserves off the field.
FAQs About Cricket Bat Knocking-In and Maintenance
What is knocking-in a cricket bat?
Knocking-in is the gradual preparation of a cricket bat's willow using controlled impact, usually with a bat mallet, before regular use with a hard cricket ball.
Is knocking-in necessary for every cricket bat?
Not every bat has exactly the same preparation requirements. Some bats may come partially prepared, so players should always check the manufacturer's instructions before starting.
Can I use a new cricket bat directly in a match?
It is generally better to ensure the bat has received the appropriate preparation before exposing it to full-speed leather-ball cricket. Follow the manufacturer's preparation instructions.
How hard should I hit the bat during knocking-in?
Start with controlled, moderate impacts and gradually increase the intensity. Knocking-in should not involve immediately hitting the bat with maximum force.
How do I know when my bat is ready?
The bat should have received suitable preparation and controlled ball testing without developing concerning damage. If you are uncertain, seek advice from the manufacturer or an experienced bat professional.
Can I use a cricket bat in rainy conditions?
You should avoid unnecessary exposure to water. If the bat becomes wet, remove it from the wet environment and allow it to dry naturally in a suitable location.
Can I dry a wet cricket bat in direct sunlight?
Avoid excessive or rapid drying. Strong heat or direct sunlight can create unsuitable conditions for the natural timber. Allow the bat to dry gradually in an appropriate environment.
How often should I oil my cricket bat?
Do not automatically oil the bat on a fixed schedule. Follow the manufacturer's instructions because preparation and oiling requirements can vary between bats.
How should I store my cricket bat overseas?
Keep it in a clean, dry environment away from excessive heat, direct sunlight, and moisture. Avoid leaving it permanently inside a closed kit bag.
Does Kashmir Willow need knocking-in?
Preparation requirements vary by bat. Follow the manufacturer's instructions rather than assuming that every Kashmir Willow bat needs exactly the same treatment.
Does English Willow require more maintenance?
English Willow is generally softer and often used for performance-focused cricket, so careful preparation and handling are particularly important. However, every cricket bat requires sensible maintenance.
How can I protect my bat during overseas travel?
Use a suitable bat cover, prevent heavy equipment from pressing against the bat, avoid extreme temperatures, and inspect the bat after arriving at your destination.
When should I stop using a damaged cricket bat?
If you notice significant structural damage, a loose handle, serious cracking, toe separation, or other major problems, stop using the bat and have it assessed by an experienced professional or the manufacturer.
Explore Cricket Equipment at Heega Sports
Whether you are preparing for your first overseas cricket season or travelling for professional competition, having reliable cricket equipment is an important part of your preparation.
Explore cricket bats, cricket balls, protective equipment, kit bags, and other cricket essentials from Heega Sports.
Related posts
 English Willow Cricket Bat Knocking-In Explained: Preparing the Blade Before Match UseLearn how to knock in an English Willow cricket bat, prepare the blade before match use, avoid common mistakes, and protect your bat from premature damage.
 Ordering Cricket Equipment for a Club or Academy: An Overseas Buyer's ChecklistOrdering cricket equipment for your club or academy from overseas? Use this checklist for bats, protective gear, quantities, samples, shipping and quotations.
 The Complete Pre-Season Cricket Gear Checklist: From Bat Maintenance to Protective Armour.Get match-ready with the ultimate pre-season cricket gear checklist. Learn how to inspect, restore, and maintain your bats, protective armour, spikes, and kit bag.